
- STARTER (200 MB)
- PRO (1 gb)
- BUSINESS (5 gb)
- BUSINESS+ (10-500 gb+)
A workspace is the central hub for the business. It’s the umbrella for projects and departments. Adding files and organizing them in folders allows everyone in the workspace to access the same information.
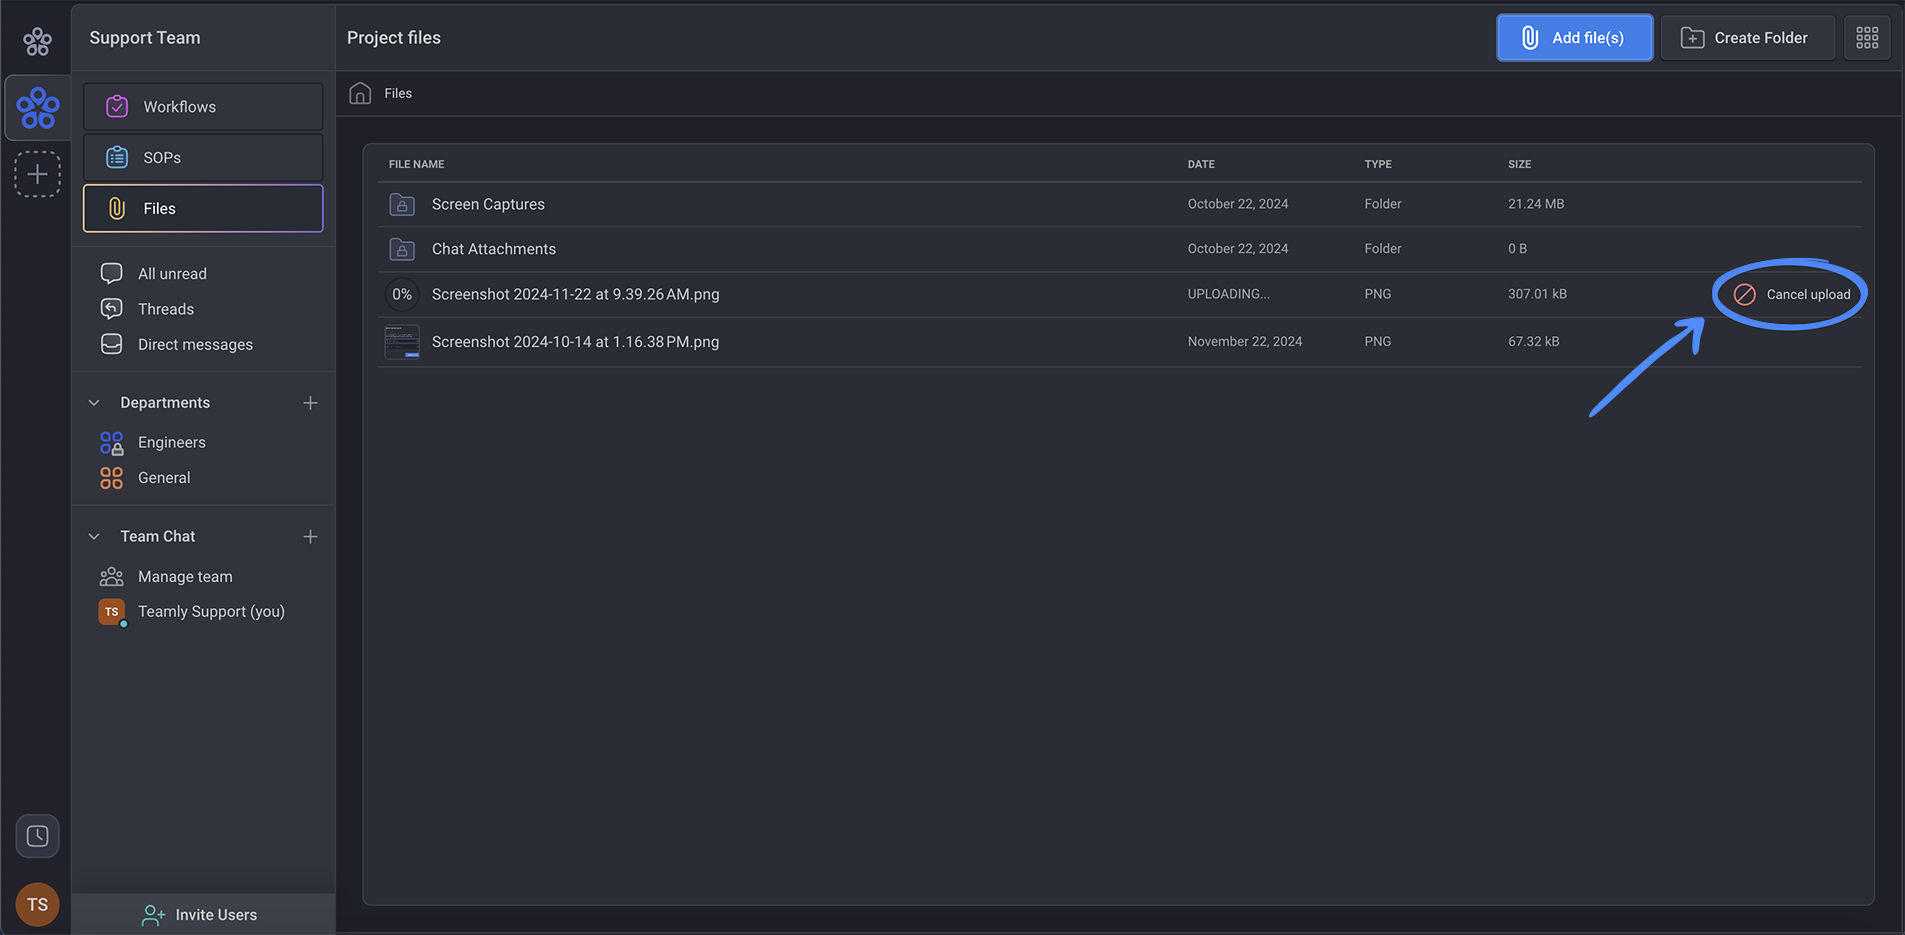
In the left side panel, locate and click on the "Files" tab.

Click on the "Add file(s)" button located at the top right side.

Select and import the desired file(s).

After selecting the file, it will be imported and made available for viewing or sharing.

If you no longer wish to import a selected file during the upload process, you can click on "Cancel Upload" to stop the import.
You can perform various actions on a file by right-clicking on it, such as opening, renaming, downloading, sharing, viewing its properties, or deleting it.

- Locate and click on the "Files" tab in the left side panel.
- Click on the "Add file(s)" and select the file you'd like to add to your workspace.
- The file will upload and be shown within the files view once completed.
- Locate and click on the "Files" tab in the bottom menu of the mobile app.
- Click on the "+" icon at the top right side.
- Select the camera option if you'd like to take a picture to add to your workspace, select an image from your gallery or choose to attach a file.
Was this article helpful?
That’s Great!
Thank you for your feedback
Sorry! We couldn't be helpful
Thank you for your feedback
Feedback sent
We appreciate your effort and will try to fix the article
